
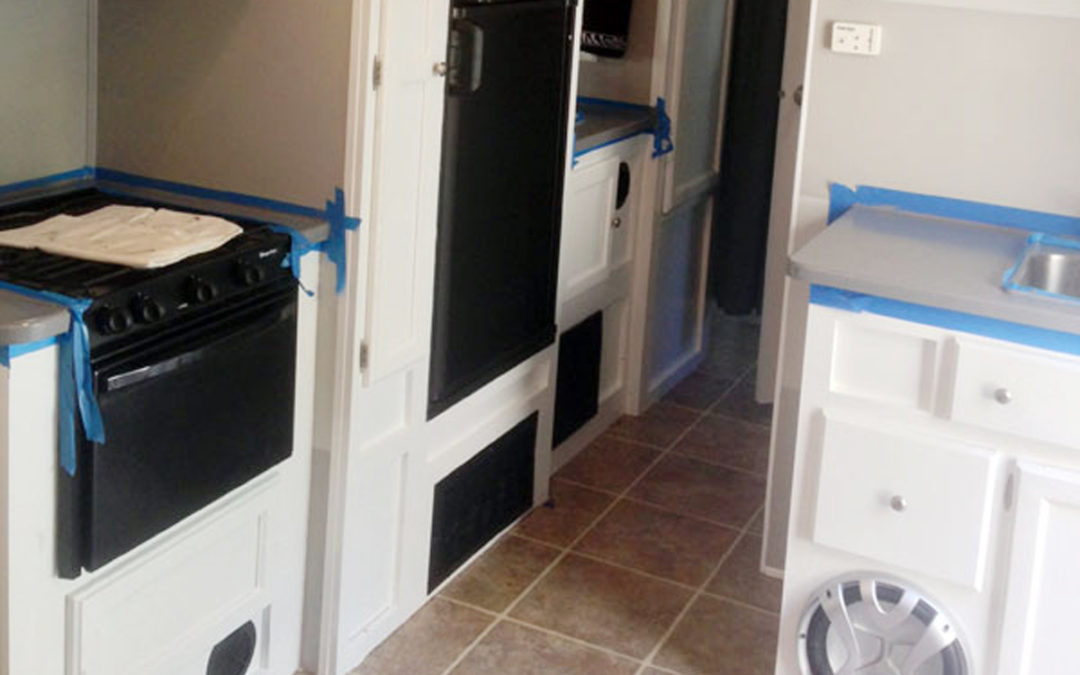
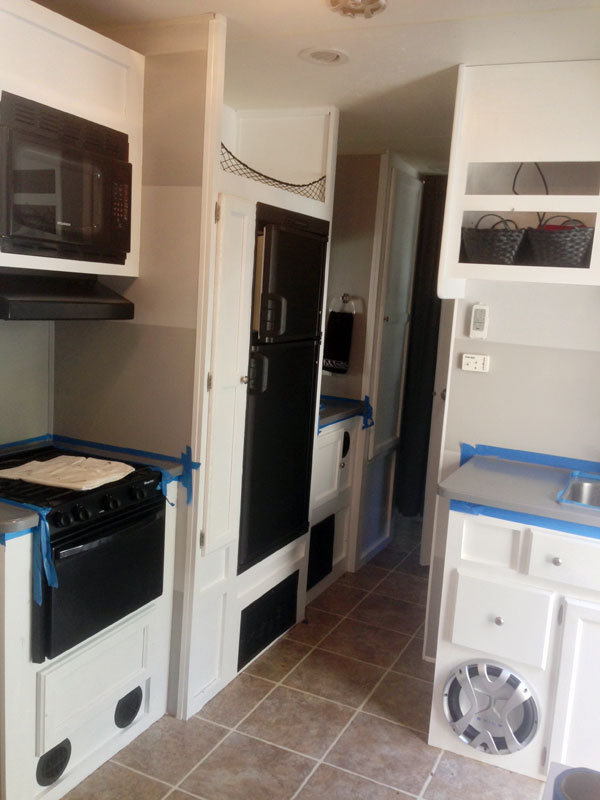
I am back at the Toy Hauler Renovations this week as my injuries are feeling much better and my anxiety to get things finished kick into high gear. Today I took on one of the bigger hurdles – The laminate counter tops.
As with everything else I have discovered with the craftsmanship of our camper, the laminate countertop’s rubber edging is popping out and is now warping after 7 years. That and the hideous colors that didn’t match the factory decor, let alone our new design inspired me to check out my options. I priced out getting new counters but the idea of getting the sinks and stove removed and then reinstalling was daunting. Then came the Counter Top Transformations kits which weren’t much less costly than having new counters ordered! Besides, there were not any colors that really caught my eye. Plus, this is our home away from home but please – I would rather invest that kind of money into the new flooring! So when I spotted the Rust-Oleum Counter Top Coating for $19.99 I was intrigued.
If you are anything like me, you will know what I mean when I say, “It was time to check out Amazon!” Oh yeah, it’s read the reviews time! And the reviews were not that great. The majority said that the coating chipped, dented and scratched. I knew the smell would be dizzying and that there would be cure time between coats, but since this is not going to be applied in my kitchen, but in my RV, I figured the patience required to do a quality job was in the bag! I wouldn’t be placing anything on the counter for potential weeks and if I kept the windows open, the fumes would dissipate between coats easily.
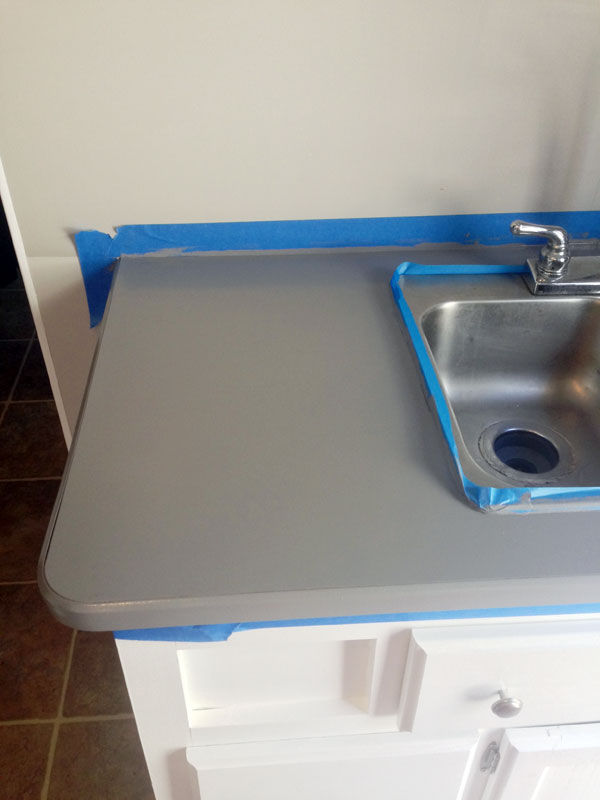
I also read a review that referred to applying a top coat. Well, I am here to tell you that the uber expensive kits out there simply include a can of polyurethane to apply so in addition to the 1 quart can of coating (tinted to Pewter, much lighter than the kit’s offered in the grey shade) I added a quart of Rust-Oleum Varathane polyurethane and a high quality paint brush, foam rollers and brushes, rubber gloves, a can of acetone (only way to clean up after yourself), 2″ painter’s tape, an X-Acto knife, super fine sandpaper and a few mini paint pans. All for around $65.00. Not bad aye?
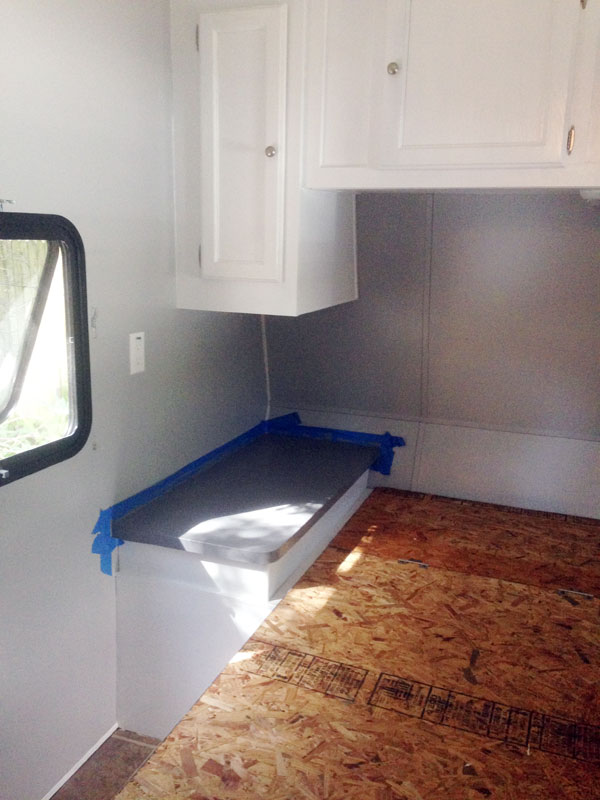
I am here to tell you, so far I am VERY please with the results. After getting the first coat down it all went very quickly!!! It dries rather fast so I would recommend you blue-tape your edges and appliances and then use the foam brushes to apply the coating up to your edges as quickly as you can. Then use foam rollers to quickly apply a somewhat heavy coat over the counter top. Please understand that it goes on thick but do NOT go over an area twice. You need major patience to do this. You will create lines and roller tracks of gooey paint if you go over an already coated area. If you see a light spot, you are going to have to wait three days to fill it with your second coat!!!! Yes, you read that correctly – Three Days to Cure! Three Days for Second Coat! THREE DAYS PER COAT!
This is where the X-Acto knife comes in. Because you will need to apply a second coat and then the top coat, you will need to remove the painter’s tape with the knife. Once you have applied the first coat and waited your three days, use the super fine sandpaper to sand the counters and then clean them REALLY GOOD! Now you can apply the second coat and yes, wait three days.
I know I keep saying three days but seriously, this is an epoxy/oil based paint that needs to cure. If you lay something down on the counter before completely cured, it will leave an indention.
Once you have finished applying the coating, you can then apply the polyurethane with a brush. I wouldn’t recommend using a foam roller as they have the tendency to create bubbles. They sell brushes specifically for applying poly – Spend the $10.00 on the brush! And I am proud to say that after “Feelin’ Good” from the fumes of the coating and the agony of trying to clean up the gooey messes you will most likely create, the Varathane Polyurethane is water-based giving low-odor and easy breezy clean up!
And guess what? It only requires you to wait 2-3 HOURS between coats! YAHOOOOO!!!!! I would recommend anywhere from 4 to 6 coats. The more coats you apply the smoother it gets. Just like with the Counter Top Coating, the first coat will look groovy. As tempting as it is after waiting a week to get to this step, don’t give in now! Wait the couple hours to apply the next coat. It is well worth the wait!


How is this holding up?
I truly wish I knew 🙁 The Toy Hauler got totaled before we were able to put it to the test